Lifetime Deal: $100 One-Time — No Renewals, Ever!
Documentation

Getting started

External Images for WordPress

This guide is here to help you get started with the External Images Plugin for WordPress. With this plugin, you can easily import images from external URLs into your media library. Whether you’re managing your own site or building one for a client, this documentation will walk you through the key features and show you how to save time and keep your media organized.

Features

  1. External Image Import Instantly pull images from any URL straight into your WordPress media library.
  2. Bulk Import, Made Simple Import dozens (or hundreds) of images in one go. Perfect for handling large media collections effortlessly.
  3. Built for WooCommerce Fully optimized for WooCommerce, so your product images sync smoothly without extra steps.
  4. WP All Import & Export Integration Works hand-in-hand with WP All Import & Export, making it easy to move posts, products, and media across sites.
  5. JSON & XML File Support Import images directly from structured JSON or XML files, giving you more control over complex media workflows.

Installation

External Images Plugin Customer Dashboard

Getting started is quick and easy:

  1. Download the Plugin
    Grab the latest ZIP file from externalimagesplugin.com.
  2. Upload to WordPress
    In your WordPress dashboard, go to Plugins → Add New, then click Upload Plugin and select the ZIP file.
  3. Activate
    Once uploaded, click Activate Plugin—and you’re ready to go.

Getting Started

External Images Plugin License Key

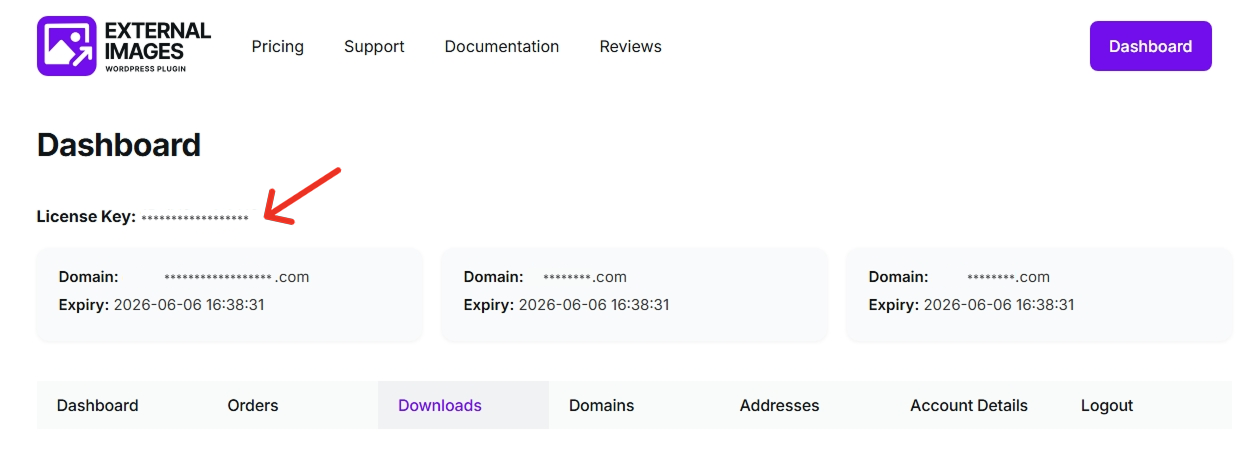
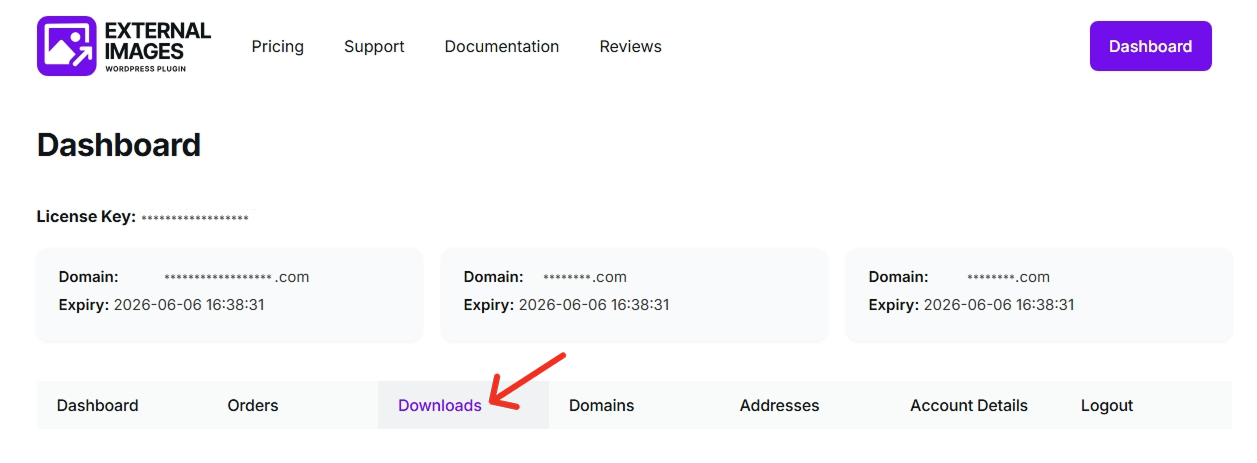
Activate your plugin in just a few steps:

  1. Get Your License Key
    Log in to your customer dashboard and copy your license key.
  2. Open the License Page
    In your WordPress admin panel, go to External Media → License.
  3. Activate
    Paste your license key into the field provided and click Activate.
Important Notes

Make sure the domain linked to your license matches the site where the plugin is installed. Activation will only work on registered domains.

Import Images via URL Input

Import External Images to WordPress via URLs

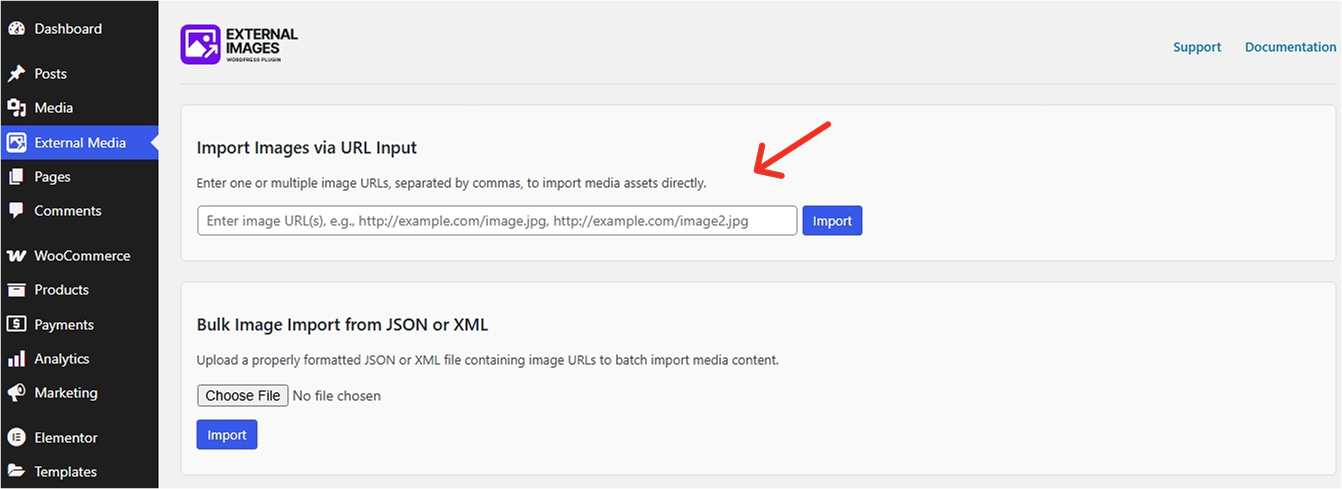
Bring external images into your WordPress site in seconds—no manual uploads required. Here’s how:

  1. Go to Your Dashboard – In your WordPress admin panel, find the External Media menu just below Media.
  2. Open the Import Tool – Click External Media to access the plugin settings, then scroll to the Import Images via URL Input section.
  3. Paste Image URLs – In the input field, paste one or more image URLs you want to import.
  4. Click Import – Hit the Import button. The plugin will fetch the images and add them to your media library—ready to use in posts, pages, or products.
Important Notes

Import multiple images at once by separating each URL with a comma. Example: https://example.com/image1.jpg, https://example.com/image2.png. The images remain hosted externally, helping you save storage space while still using them like any other media in WordPress.

Bulk Image Import from JSON or XML

Bulk Import External Images into WordPress from JSON or XML files

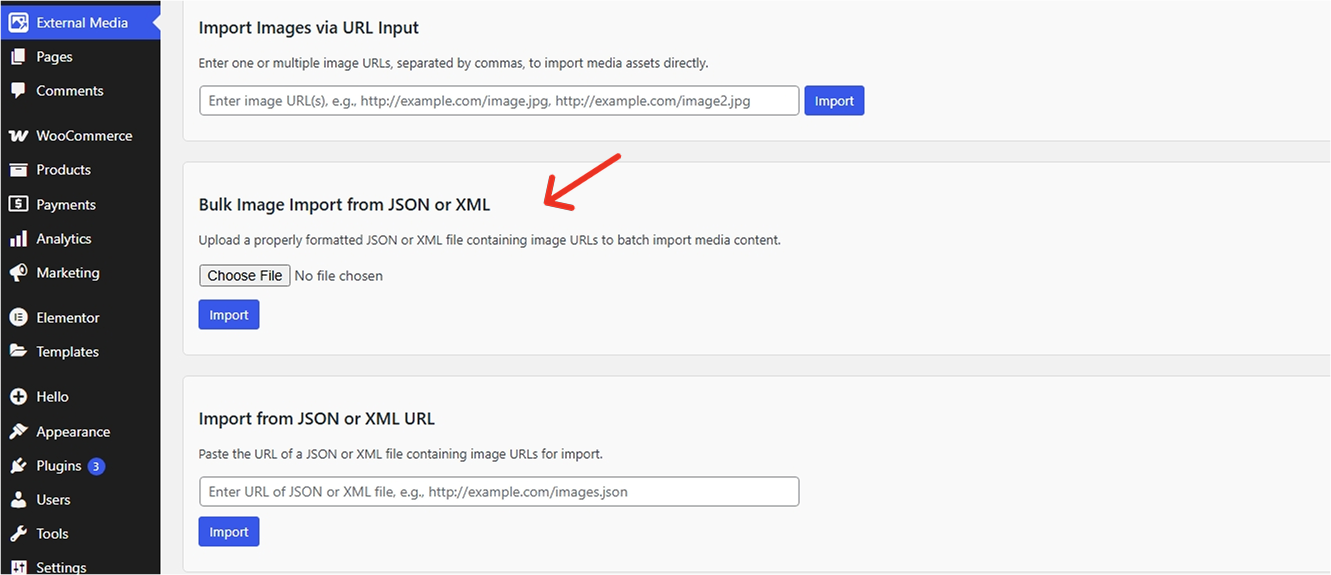
Managing a large number of images, especially on WooCommerce sites or content-heavy blogs can be time consuming. The External Images plugin streamlines this process by letting you bulk import images using a JSON or XML file that contains your image URLs.

How to Import a JSON File

  1. Go to your WordPress dashboard.
  2. Click External Media from the left-hand menu.
  3. Scroll to the Bulk Image Import from JSON or XML section.
  4. Click Choose File and select your .json file containing the image links.
  5. Click Import to begin the upload.


How to Import an XML File

  1. Open your WordPress admin panel.
  2. Navigate to External Media in the sidebar.
  3. Find the Bulk Image Import from JSON or XML section.
  4. Click Choose File and select your .xml file with image URLs.
  5. Click Import to start the process.
Important Notes

Make sure your JSON or XML file is properly formatted and contains valid image URLs to ensure a smooth import.

WP All Import External Images

WP All Import External Images

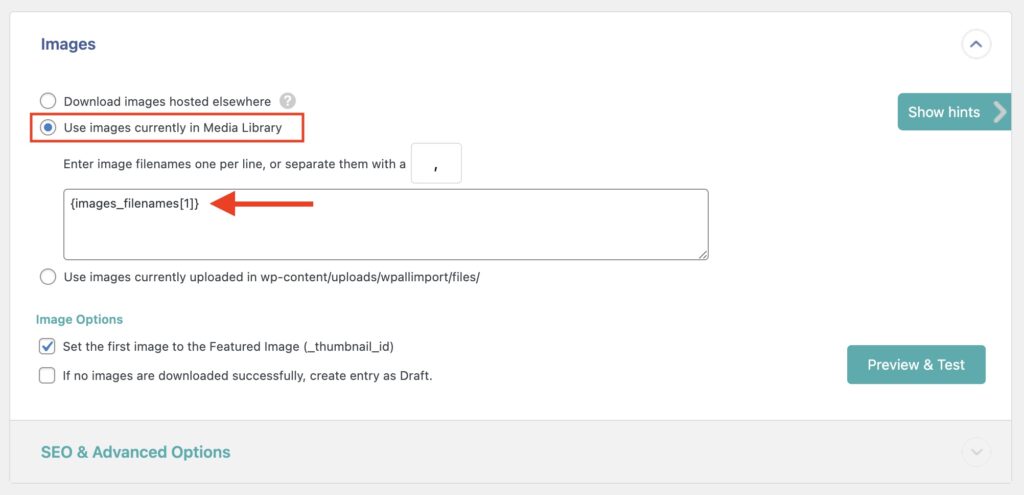
If you’re using the WP All Import & Export plugin to import posts or products, the External Images plugin makes it easy to manage your images alongside that workflow. Here’s how to use them together:

  1. Import Your Images First – Start by uploading your XML file within the External Images plugin and import all external images.
  2. Verify Media Library – Make sure all images are successfully imported and visible in your WordPress media library.
  3. Proceed with WP All Import – Open WP All Import and begin your product or post import as usual.
  4. Configure Image Settings – In the Images section of the import settings, select: “Use images currently in Media Library
  5. Map Image Data – Drag the appropriate import fields (e.g., image filenames) into the image fields. This tells WP All Import to link to the already-imported images instead of downloading them again.
  6. Finish the Import – Complete the rest of the import process as guided in the WP All Import documentation.Note:

    This method ensures faster imports and avoids duplicate image downloads, especially useful for large product catalogs.